
Layered Decorative Materials
Brass, glass, and fabric tassels create a layered pendant with decorative texture.


Buy 1
Buy 2
Buy 3+
Orders over $330
Orders over $500
 Free Shipping
 14-Day Returns
 Secure Payment
 Customer Service
This indoor pendant light pairs a rounded glass shade and brass fitting with fabric tassel trim in yellow and brown.
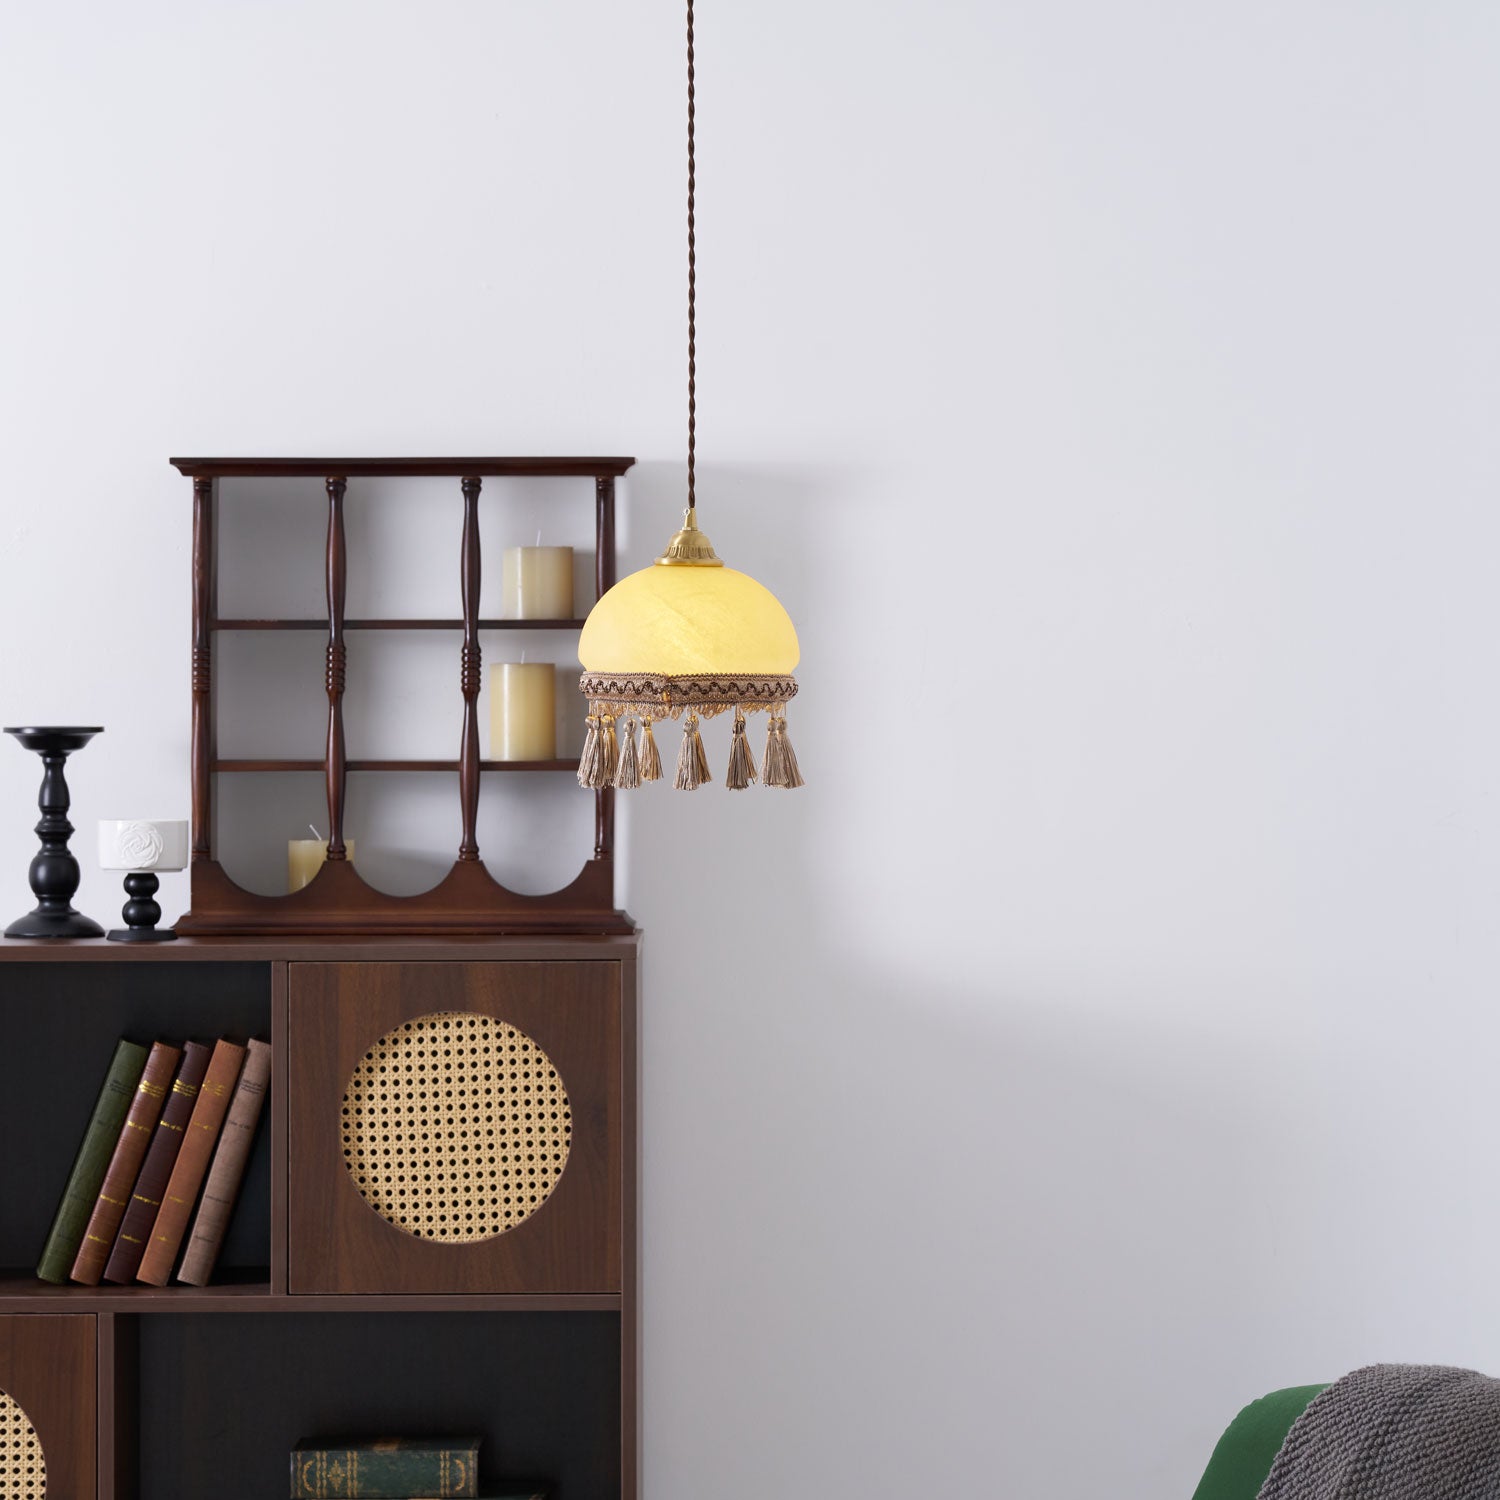
Brass, glass, and fabric tassels create a layered pendant with decorative texture.
An inline On/Off push button switch provides direct control along the cord.
The 180″ wire with plug switches supports the distinctive swag-style arrangement.
A contemporary free-blown form brings sculptural character inspired by Victorian decadence to indoor spaces.
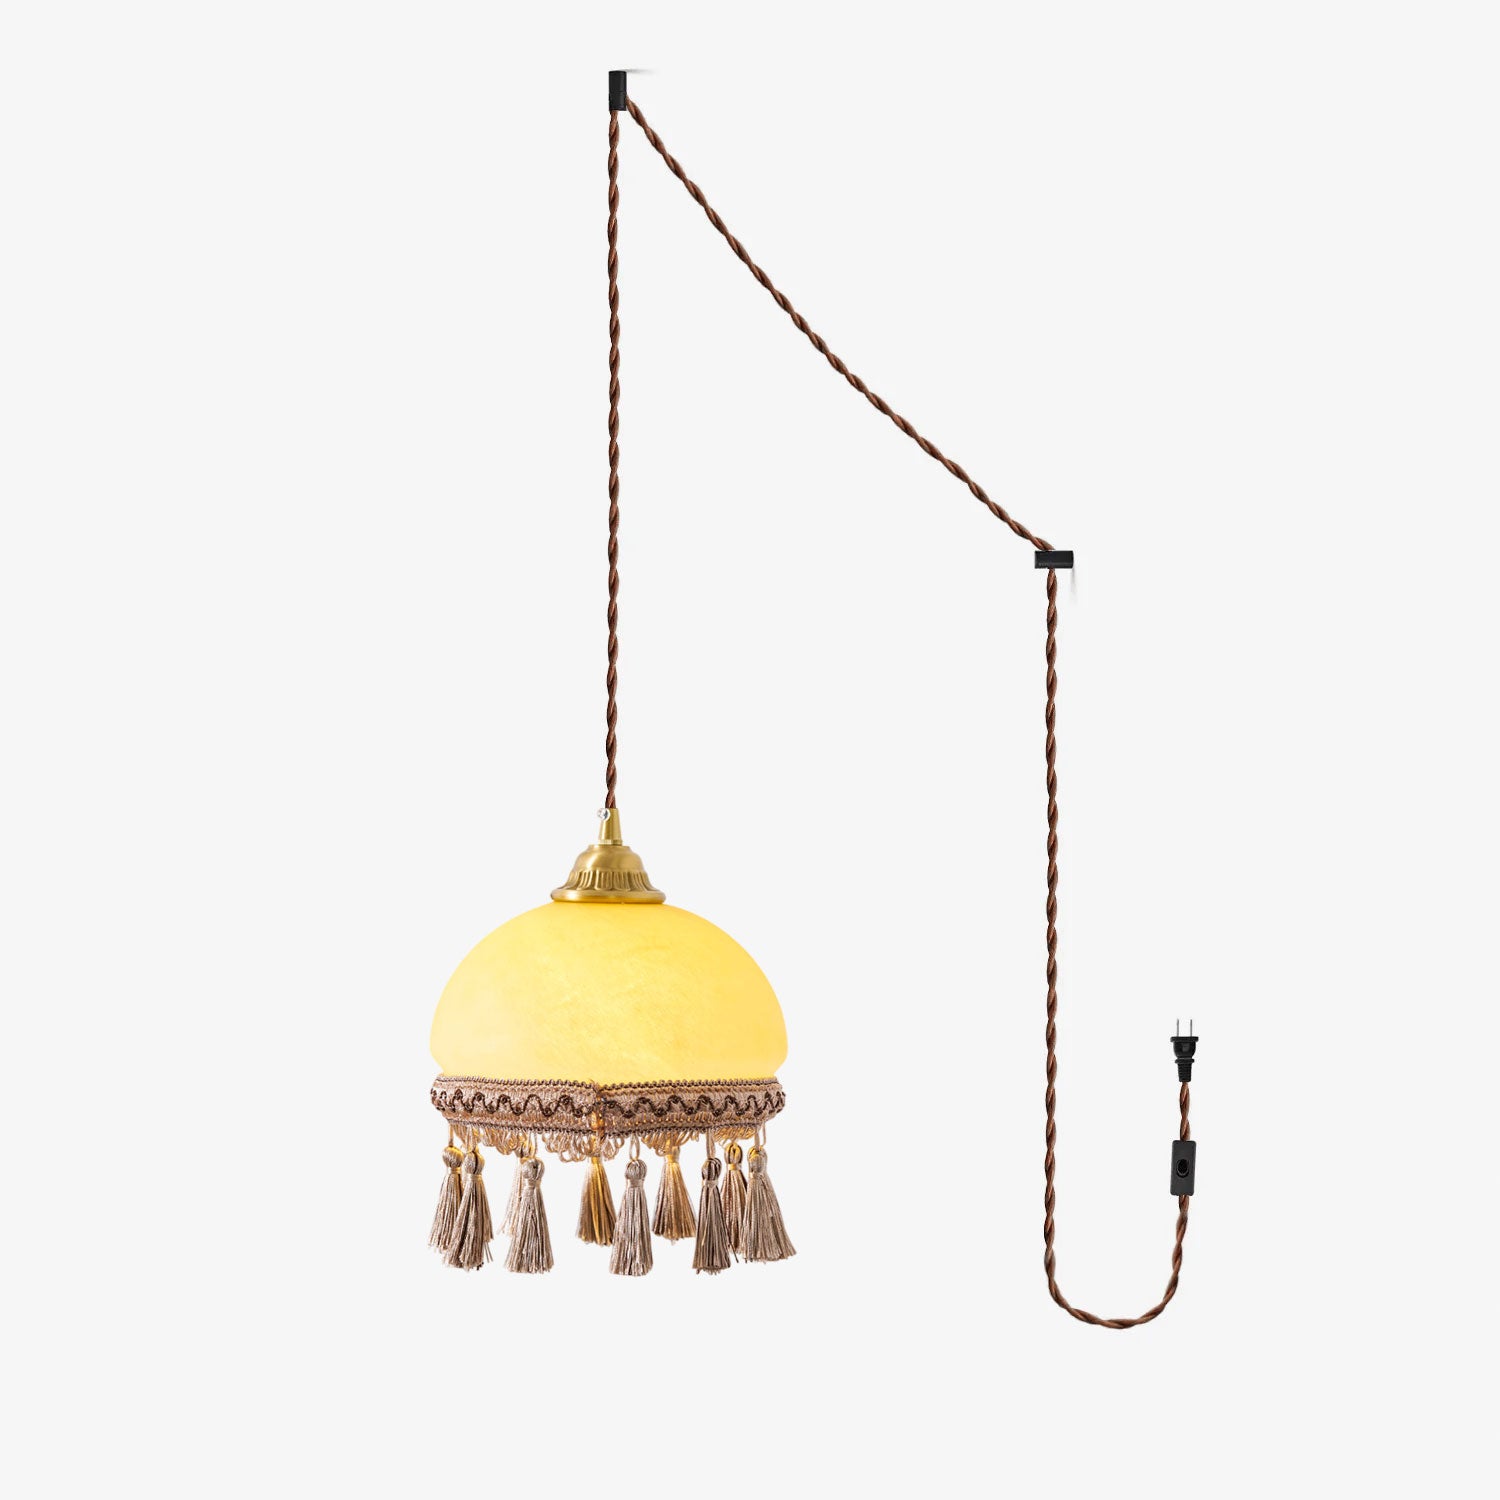
Review the original product details below before choosing the right option for your space.
| Product Type | Pendant light |
|---|---|
| Size | ∅ 7.9″ x H 9.4″ / Dia 20cm x H 24cm |
| Color | Yellow+Brown |
| Plug Options | US Plug · UK Plug · EU Plug |
| Material | Brass, Glass, Fabric Tassels |
| Voltage | AC 110-240V |
| Mounting | Ceiling |
| Environment | Indoor |
| Weight | 3kg / 6.6lbs |
| Bulbs | Not included |
Monulo · The practical guide
Find a starting size, see where to place it, and know what to check before installation.
Find your starting size01 · Get the scale right
For a central ceiling light, enter your room dimensions. For lights above furniture, use the table or island guide below instead.
Measure first, then mock up the actual shape. Suggested dimensions are design starting points; product instructions and applicable local requirements take priority.
02 · Look up
The available drop matters as much as the fixture diameter.
Around 8 ft / 2.44 m
Start with a flush or compact semi-flush design in walking areas. Check the complete installed height.
Around 9–10 ft / 2.74–3.05 m
Pendants become easier to accommodate. Reserve enough clearance below the lowest part of the fitting.
Above 10 ft / 3.05 m
Test larger forms or longer suspension. Confirm cable length, access for maintenance and ceiling support.
Sloped ceiling? Compatibility is model-specific. Confirm the canopy, suspension angle and required drop before ordering.
Room study 01
Let the furniture define the focal point.
Room study 02
Plan the whole row before choosing the quantity.
Room study 03
Use the room formula as a visual starting point.
Room study 04
A consistent rhythm works better than a crowded ceiling.
Room study 05
Put comfortable facial lighting first.
Room study 06
Choose the height from where you actually sit.
Room study 07
Light the page without exposing the source.
03 · Before the tools come out
Bring the product instructions, room measurements and fixture weight to your installer.
01 / Fit
Check door swings, seated views, shade gaps and the lowest point. Include the canopy and suspension in every drop measurement.
02 / Support
Have a qualified installer confirm the box, fixing points and structural support for the complete fixture weight.
03 / Compatibility
Confirm supply voltage, lamp or LED driver, dimmer compatibility, ceiling type and location rating for the exact model.
Hardwired fixtures should be installed by a qualified electrician following the supplied instructions and local requirements. This page explains planning and placement; it does not provide wiring instructions.
04 · The last few details
Measure vertically from the finished ceiling to the lowest point of the assembled fitting. Over a table or counter, measure the remaining gap from that point to the surface.
No. Diameter describes the physical size. Compare lumen output, shade opacity, beam direction and the room’s other light sources separately.
Start with the shade diameter, then draw the complete row to scale. Two larger shades and three small shades can both work; use actual edge gaps and counter-end clearances to decide.
Compare a shorter suspension or a flush alternative that the manufacturer supports. Never shorten a rigid stem or modify wiring without the appropriate product guidance.
No. Check the exact product specification and installation position. Ask a qualified installer to confirm the required damp or wet rating and canopy compatibility.
Include a room photo, ceiling height, room or furniture dimensions, the fixture link and your proposed installation location. For heavier fittings, include any available mounting information.
Monulo · Plug-in pendant lighting
Add a pendant to your favorite corner without a dedicated ceiling electrical connection.
Explore plug-in pendants01 / Two ways to power a pendant
The difference starts with your power source—and the way you want the room to work.
Love flexibility? Consider plug-in. Prefer a seamless ceiling finish? Consider hardwired. Both need secure mounting suited to the fixture and the surface.
02 / Make room for a little more light
Bring a focal point to a bedside, a favorite chair, a rental corner or the place where ideas take shape.


Check your lease before adding hooks or drilled fixings. Cord length and support still need to match the exact product.
Discover the bestsellers03 / A little planning goes a long way
Start at the outlet, work toward the hanging point, and include the final drop in your measurements.
Check outlet position, plug type and supply voltage against the product. Keep the plug accessible.
Test the lowest point above the chair, bedside or table. Keep heads, doors and walking routes clear.
Measure A + B + C along the actual route, with enough allowance for bends and the specified installation. Compare this with the usable cord length before ordering.
Use the manufacturer-specified suspension hardware and fixings appropriate to the ceiling, wall and fixture weight. Confirm included hardware on the product page.
Keep cords out of walkways, moving furniture and door gaps. Do not improvise load support, conceal flexible cords inside walls, or modify the plug. If the route does not work with the supplied cord, ask about a suitable model before buying.
05 / Before you choose
Plug-in models draw power from a compatible outlet rather than a dedicated ceiling electrical supply. They still need suitable mounting and suspension as described in the product instructions.
A plug-in model typically does not use a ceiling electrical junction box for power. Mounting requirements vary. If the setup needs new wiring, an outlet change or any hardwired connection, use a qualified electrician; ask an installer for help when support is uncertain.
The steps depend on the exact fixture and surface. Hooks, anchors, brackets or drilling may be required. Read the product instructions and confirm the hardware before purchase.
It can be an option when rewiring is not practical, but it is not automatically damage-free. Check your lease and your landlord’s requirements for ceiling or wall fixings.
Measure from the outlet along the intended wall and ceiling route, then include the drop to the fixture. Allow for bends as instructed, and compare the total with the model’s usable cord length. Cord length varies by product.
The location needs a compatible outlet, suitable mounting, a safe cord route and the conditions specified for the model. Bathroom and outdoor use require the appropriate product rating; plug-in does not imply suitability for these locations.
Questions? Email support@monulo.com.

Discover lighting that fits your space, your style, and the way you live.
Shop plug-in pendant lights


